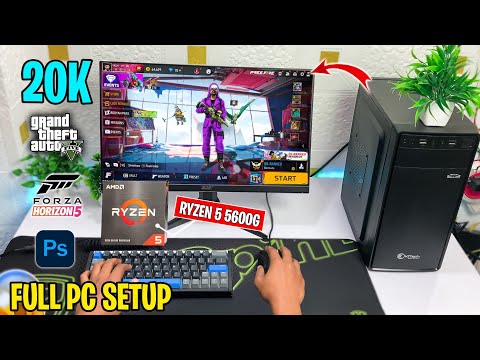
Old low-end PC to New Powerful Ryzen 5 5600g PC
[Intro]
Recently, we got our hands on some new components, so today I’m going to show you everything we’re upgrading in our PC. First up, we have a 1TB M.2 SSD that we’re going to install. Along with that, I’ve ordered another 8GB RAM stick, so now we’ll have 16GB total, which should give us much better gaming performance.
Now, here’s our main component — the CPU. We’ll need thermal paste to install it, which I’ve already ordered.
So let’s unbox everything one by one. All components are sealed packs, and I’ve purchased everything new from Gamer’s Paradise. If you want to upgrade your PC or build a new one, it’s super easy through them. Their number is shown on the screen — just tell them your desired PC specs, and they’ll share the price. If you’re happy with it, you can order right away.
They also have second-hand graphics cards at good prices, in case you want to upgrade your GPU on a budget.
[Unboxing and Initial Setup]
So finally, the CPU is unboxed. Here’s the stock CPU cooler — we’ll use this for now. If it gets damaged later, we’ll replace it.
Here’s the 8GB RAM stick from DTFS — 3200MHz with a built-in heatsink for better temperature control and performance. Since we already had 8GB installed, this brings us to 16GB in dual channel.
Lastly, here’s our 1TB M.2 SSD, which we’re adding alongside the already installed 256GB SATA SSD.
To install it, we’ll need to open the side panel of the cabinet (which is attached with two screws).
We’re using a basic cabinet because we’re working with a tight budget, and it already includes a built-in power supply, which is a bonus.
[Component Installation]
Let’s change the CPU first.
-
Unscrew the stock cooler (four corners, bit by bit).
-
Twist the cooler slightly to remove it — simple and clean.
-
Unlock the CPU socket and remove the old CPU (a Ryzen 5 4600G).
-
Install the new CPU properly aligned.
-
Apply thermal paste in a cross pattern for better spread and thermal performance.
-
Reinstall the cooler and screw it back tightly.
Now let’s install the RAM:
-
Unlock the RAM slot.
-
Align the notch with the slot and press down both ends until it clicks.
Now for the M.2 SSD:
-
Install it into the M.2 slot and screw it in place.
[Reassembly and Boot Test]
Now that everything is installed, let’s reattach the side panel and set up the full PC with keyboard, mouse, and monitor.
Powering it on… and yes! We see the pop-up showing the new CPU is detected.
Heading into BIOS — it may ask to press Y to reset and reboot. After a long black screen, the PC finally boots successfully.
All your software and files remain intact — no reset needed. This is a non-destructive upgrade.
[Checking System Specs]
In Task Manager:
-
New CPU is listed correctly.
-
RAM shows 16GB.
-
Storage: 256GB SSD + 1TB M.2.
We’ll later clone the OS to the M.2 SSD for better performance.
Right now, it’s running on integrated GPU (Radeon Graphics).
[Performance Tests & Benchmarks]
We installed Windows 10 on the M.2 SSD and it runs super smooth — 4K content plays easily, day-to-day tasks are fast, and 1080p video editing is smooth.
Benchmarks:
-
Cinebench R23 – Good single and multi-core scores
-
Geekbench 6 – Solid CPU and OpenCL GPU performance
-
CrossMark – Score around 1300
-
PCMark 10 – Around 6200
-
3DMark Time Spy – Score: 1301
Now, let’s move on to gaming tests.
[Gaming Performance – Emulators]
First, we tested Free Fire on Bluestacks using Ryzen 5 4600G:
-
Previously got around 60–70 FPS.
-
Now, with optimization, we’re getting 90+ FPS in the training ground.
Settings used: -
Ultra mode
-
Custom key mapping
-
Razer mouse software (400–800 DPI switching)
In solo vs squad ranked gameplay, we saw FPS ranging between 70–90, much better than before. You can optimize even more by switching to Bluestacks 4 or MSI App Player, and possibly reach 200+ FPS.
Let me know in the comments if you’d like a full PC optimization tutorial (Bluestacks settings, sensitivity, key mapping, etc.).
[PC Games Testing]
-
Minecraft (Java Edition):
-
FPS: 150–300+ (depending on the area)
-
Max settings — runs extremely smooth.
-
-
Forza Horizon 5:
-
Playable at low-medium settings
-
FPS: 60–70
-
-
GTA V:
-
All settings on low
-
FPS: 85–100
-
Super smooth experience
-
We did a 5-star police escape mission in GTA V, and even while causing chaos with helicopters and explosions, the FPS remained stable. We successfully escaped on foot — mission complete!
[Final Thoughts & Price]
If you’re wondering about the price of this PC, it’s under ₹25,000.
But note — when you buy online, there’s often no return policy. If something is damaged, you’re stuck.
However, with Gamer’s Paradise, just record your unboxing video. If anything is faulty, they’ll replace it hassle-free.
So if you’re interested, the contact number is on the screen. All other details will be in the description.
[Outro]
That’s it for today’s video. We’ll test more PC games in the next part.
Let me know in the comments which game you want to see next and if you’d like that Bluestacks optimization video.
If you watched till the end, drop a like, leave a comment, and don’t forget to subscribe.
Thanks for watching — see you in the next one!
Poderá ver o vídeo no youtube Aqui